
Managing your WordPress website
Replacing pictures and photos on a page
Select a picture in Elementor, upload a new photo or choose one from the Media Library, then publish.
6 steps2 minUpdated 13 November 2026
First open the page in Elementor (Pages → Edit with Elementor).
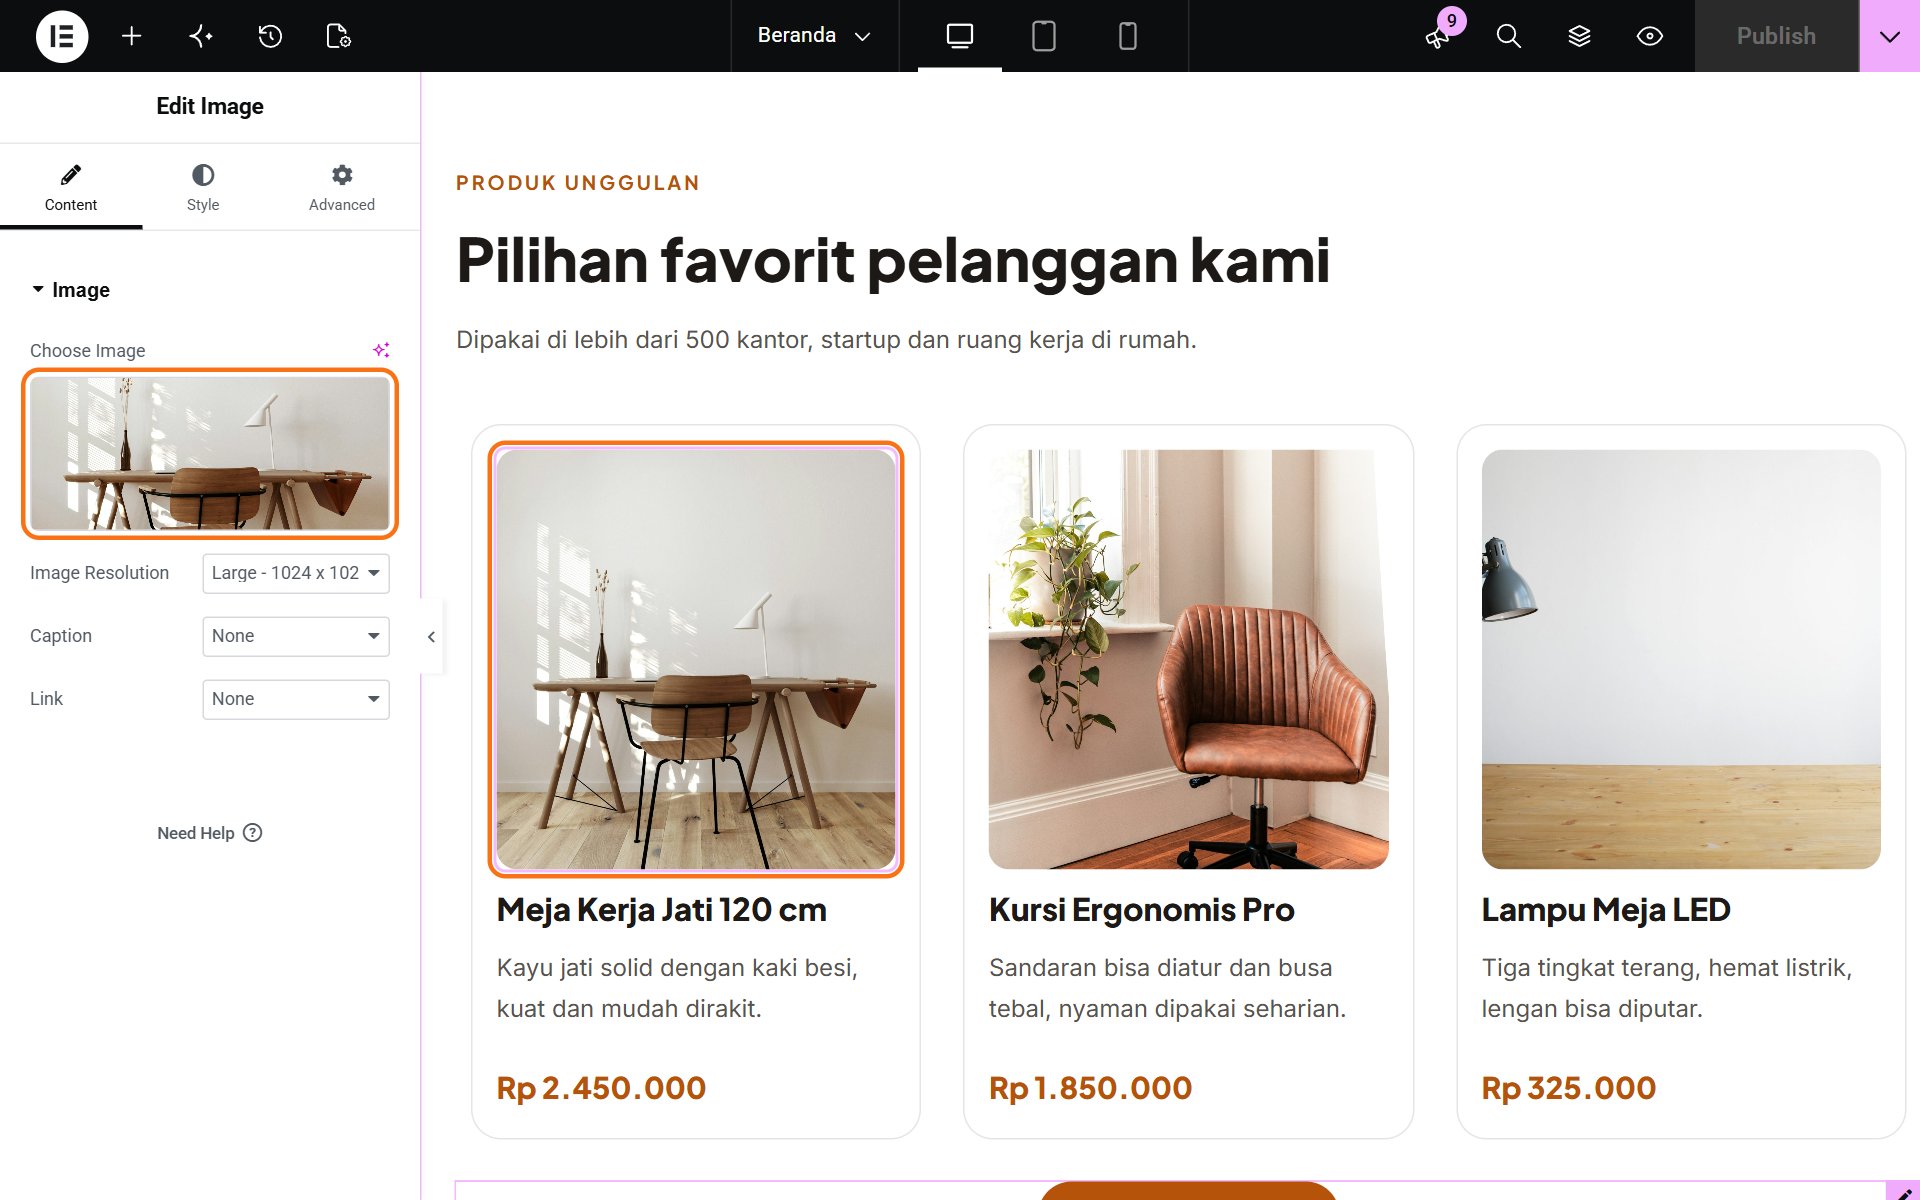
- Click the picture you want to replace. The left panel becomes Edit Image.
- Click the picture box under Choose Image.
Uploading a new photo
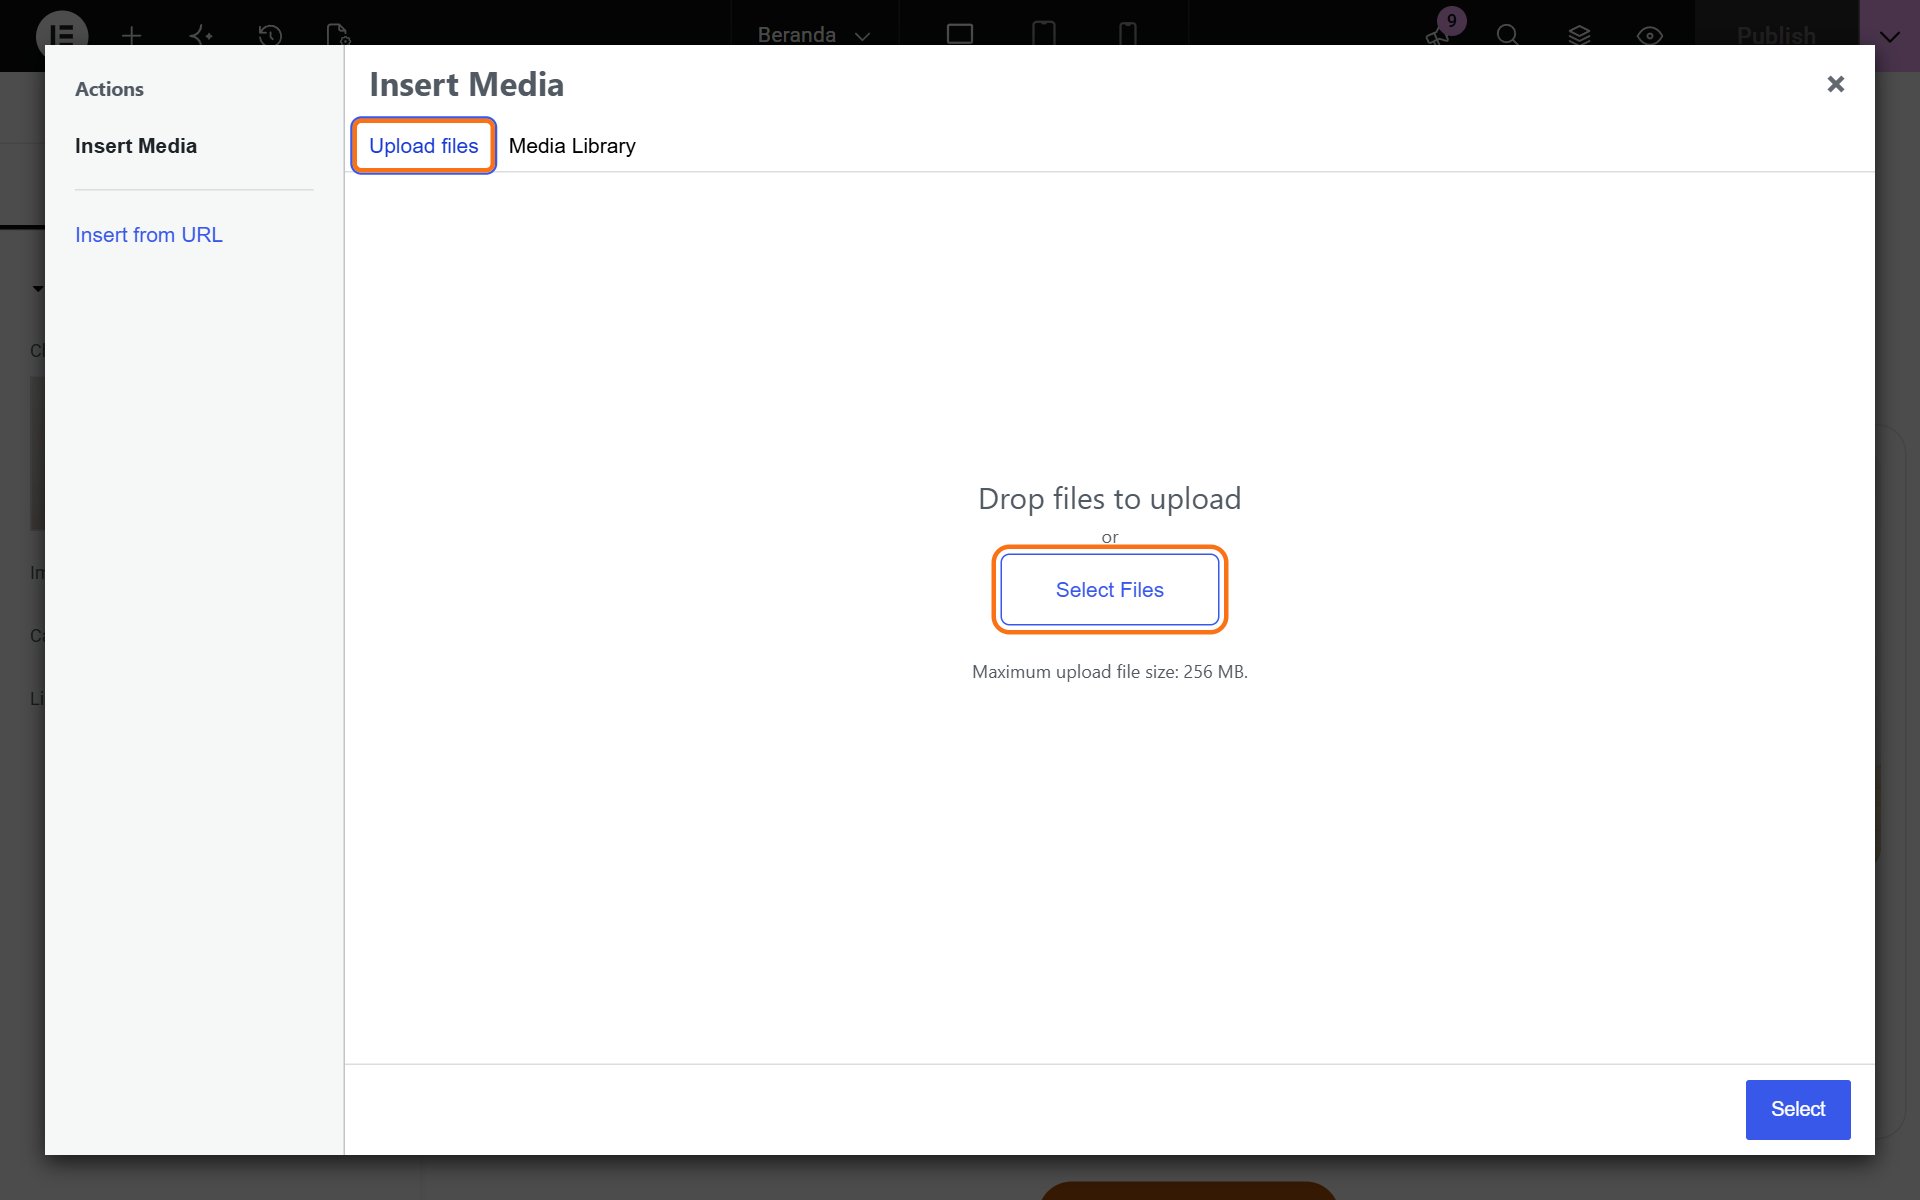
- In the Insert Media window, open the Upload files tab, then click Select Files and choose a photo from your computer. You can also drag photos onto this window.
Using a photo that is already there
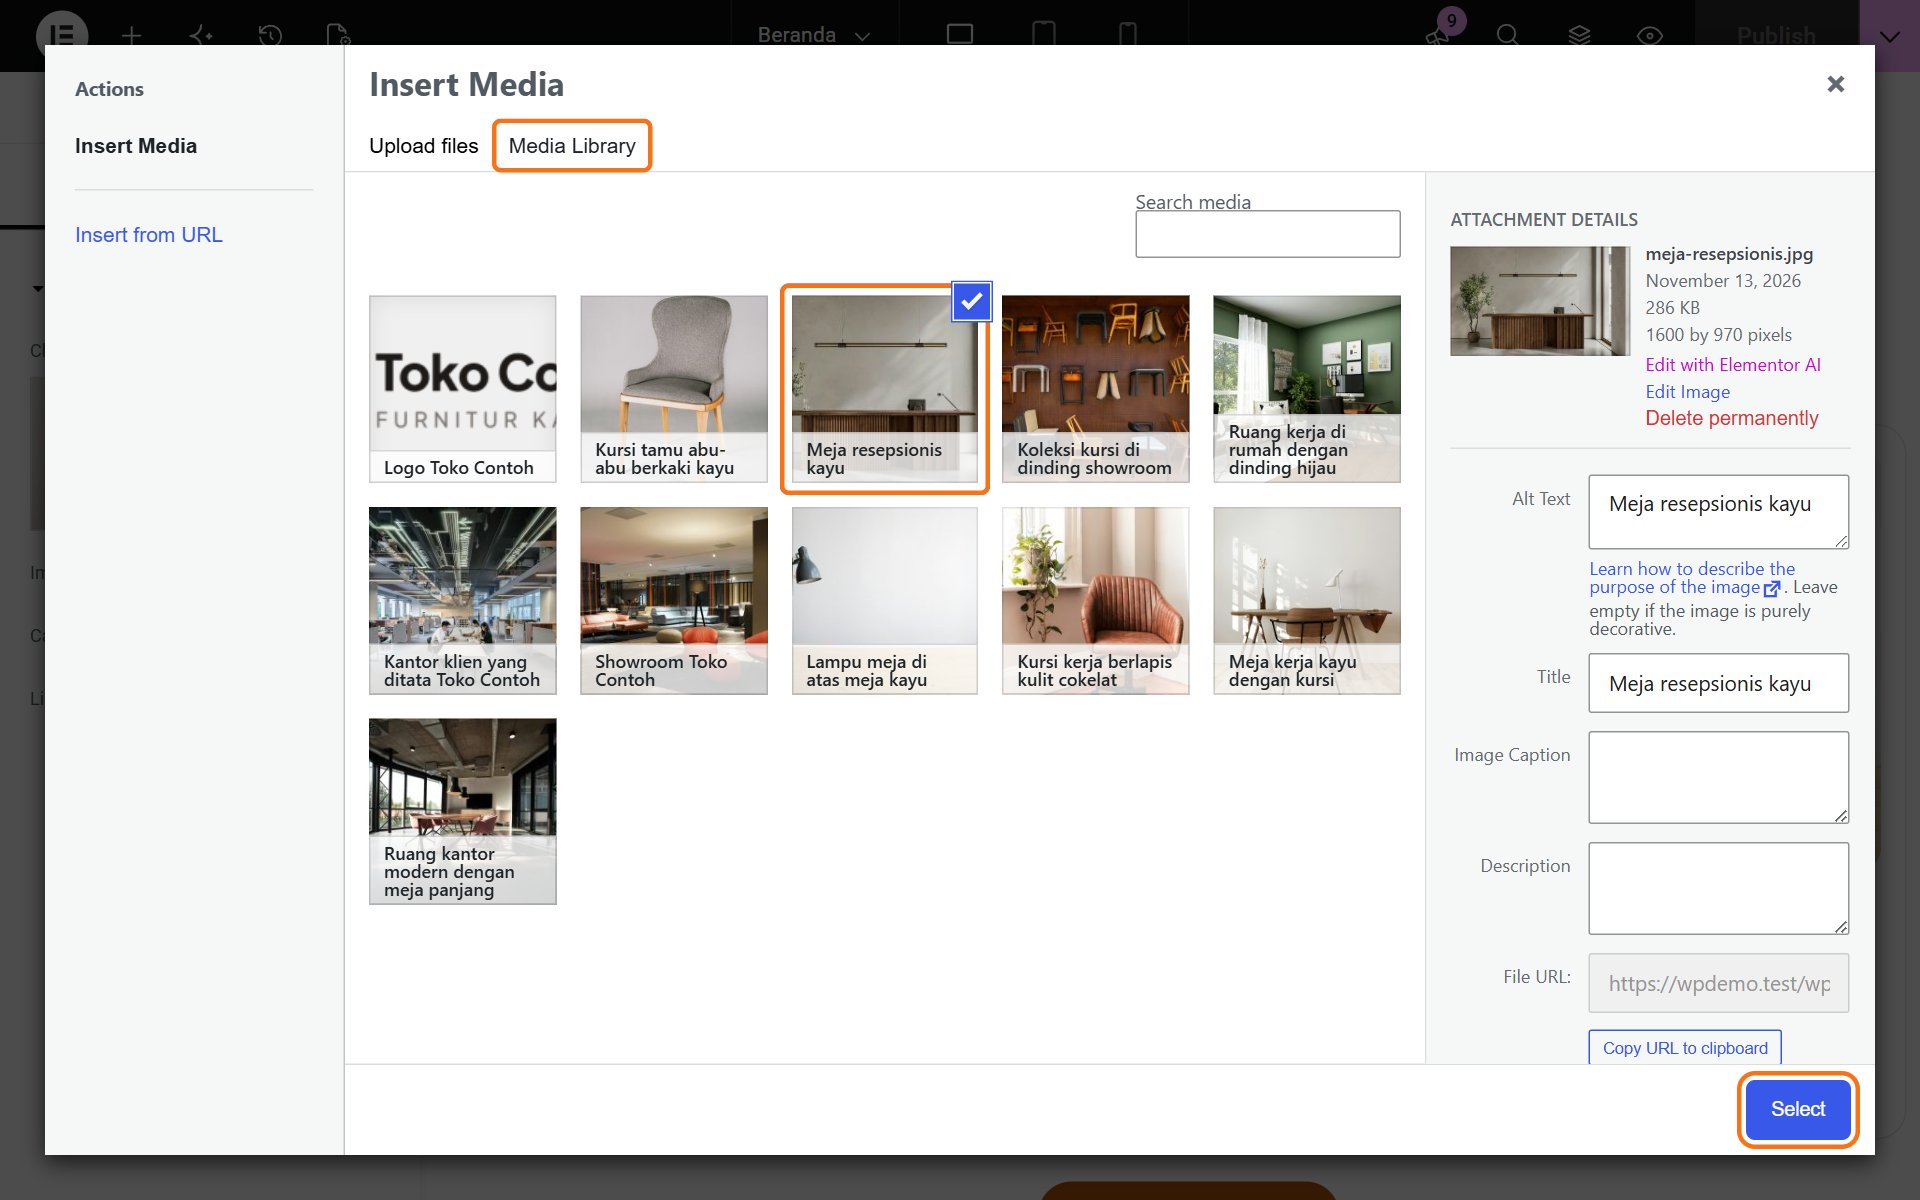
- Open the Media Library tab and click the photo. The chosen photo gets a tick.
- Fill in Alt Text on the right with a short description of the photo, for example "Teak office desk". It helps Google and screen readers.
- Click Select, then Publish at the top right of the editor.
A background picture behind a large part of the page (such as the very top) is changed on that part itself: click an empty spot in it, open the Style tab in the left panel, then replace Image under Background.
Replacing the logo
In Elementor, click the ☰ menu or the Elementor logo at the top left, choose Site Settings → Site Identity, then replace Site Logo. Use a PNG logo with a transparent background.
Photos that are too large slow the website down. See the recommended sizes in The Media Library and picture sizes.
Was this article helpful?